Frequently Asked Questions
Who is Garrdal Corporation and what is Garrdal?
Is Garrdal more expensive than other pipe boots?
Where can I find Garrdal?
For Supplier: Give us a call today and we’ll get an order shipped to you within 3 business days.
As a dealer, what are my ordering options?
How does Garrdal Ship?
What is Garrdal made of?
Does Garrdal need to be trimmed?
Where can I find more information about Garrdal?
Find a Dealer Near You
Installs in 8 Easy Steps
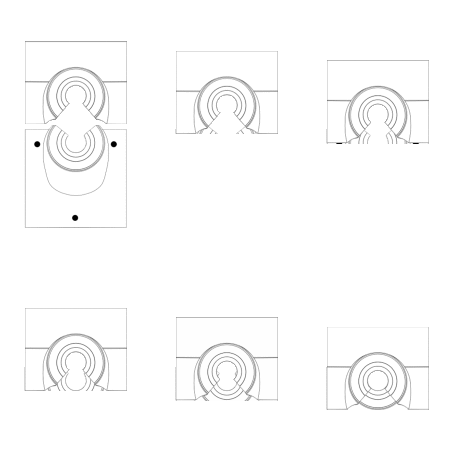
Tear Away ribs on lower are now shaped like trim guide pictured below.
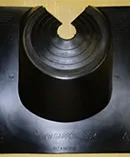
Start with the lower part of the Garrdal 2-part retrofitting
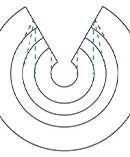
Choose a a ribbing smaller than the desired pipe size.

Carefully trim inside of rib, refer to image below
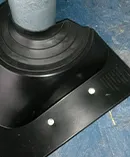
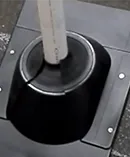
Lubricate pipe, apply pressure to snug, fasten the lower part.
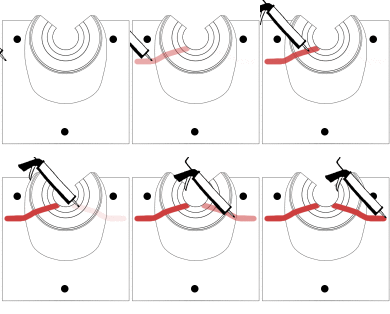
Apply sealant
Fasten upper part
Fasten upper piece
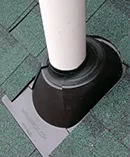
Shingle as usual
Garrdal 2-Part Pipe Flashing
Installation Video
Garrdal 12/12 Installation Video
How To Install Garrdal
You may download the Installation PDF below or watch the videos provided. We recommend you do both, as it will increase the likelihood of correct installation the first time.
Installation Guide.PDF
Resources For Suppliers
Material Data Sheet.PDF
sGarrdal 2 part retrofit pipe flashing specifications and data
Material data sheets can be found at Garrdal.com
Carbon black is added to both parts as a UV stabilizer and colorant.
For use on shingle roofs 3/12 pitch and steeper.
Designed to seal around round pipes from 1 inch diameter to 5 inches diameter.
Roof deck is to be prepped with ice and water shield, 6 inches or more beyond the footprint of the flashing if decking allows (as other flashings or per local code).
Fastener locations are marked on the product or positioned per local code.
The lower piece (with the patent number) is to be installed first after shingles are installed to the penetration the flashing is being installed around.
The upper part of the flashing is installed second, this allows positive water flow.
Installed footprint 16 ¼ inches high by 12 inches wide.
Shingles installed on the flashing are to be seal assisted as shown on product or per local code.
Shingles are to be trimmed in a fashion to allow water to flow on the flashing, do not butt the shingle against the conical riser.
Underlying shingles that meet the water channel should be nicked (just like a valley) to prevent water from catching the edge and running horizontally. See shingle manufacturer valley instructions.
Sealants used on the flashing are to be compatible with a vulcanized thermoplastic elastomer (collar/gasket) and a thermoplastic co-polymer (rigid base). A list of approved adhesive sealant for use with the flashing are on the FAQ page at www.Garrdal.com www.Garrdal.com/faq.
If a manufacturing defect is found on a Garrdal 2 part retrofit pipe flashing, return it to place of purchase for replacement.
Additional answers can be found on the FAQ page on Garrdal website or by calling Garrdal Corporation 419-279-8182
Sealing Garrdal
Attention! There are many different types of caulks and adhesive sealant and they may have different characteristics from one another. Some are meant for an outside bead to air cure and others don’t need air exposure to cure and seal. This list gets updated periodically, contact us through the chat if you have a question about a sealant not listed here.
Recommended adhesive sealant based on adhesion, flexibility and compatibility with Garrdal materials:
- Lasalle Bristol XTRM Universal Sealant
- Geocel 4600 Hybrid Structural Adhesive Sealant
- Freedom Flash by Kool Seal (Sherwin Williams)
- MS Hybrid Roofing Sealant by Uniflex (Sherwin Williams)
- NPC Solar Seal
- Quad OSI Clear (testing color options)
- Ultima Rubberized Sealant (Sherman Williams)
- Bostik Pro-MS 50
- Geocel 4500 (with primer)
- 3M weatherstrip adhesive.
- Lucas 6600
- Karna flex WB
- Karna Flex, Rubberized Elastomeric Sealant.
- Boss 125 multi-seal
- Gardner Neoprene flashing cement
- Alpha Sealants 1010 or 1021
- Dicor 501 or 551
- Henry 900
- M1 by Chemlink
- Henry 212
- Supra by Mulca
- Kop-r-lastic by Henry
